June 2, 2026 · 8:00 PM
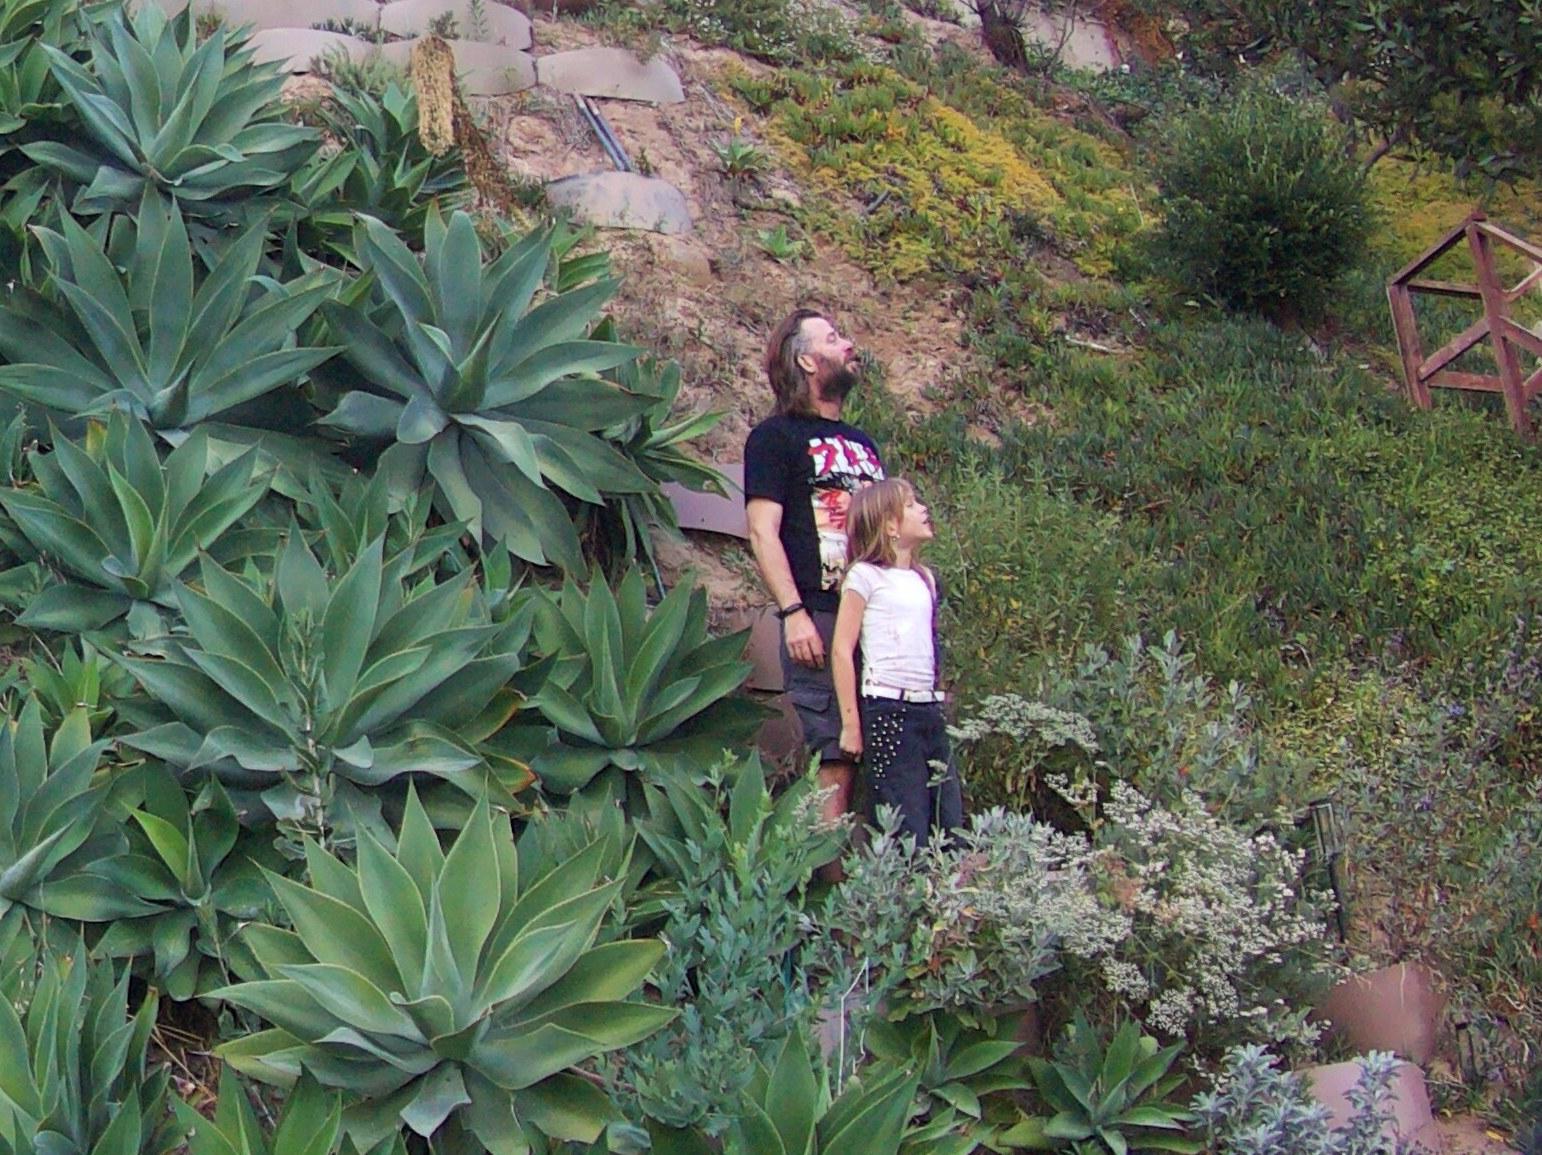
An early capture of Luna and Garrett, and the first time the camera caught the two of them. They plan to go up at this same hour regularly.
A Raspberry Pi, an Arducam HQ camera, and a 3D-printed weatherproof enclosure pointed at a Los Angeles hillside for three years.
June 2, 2026 · 8:00 PM
An early capture of Luna and Garrett, and the first time the camera caught the two of them. They plan to go up at this same hour regularly.
The Build · model & reality
drag to spin the printed body · the finished rig, installed
the body · body_main.stl
…and the finished rig on the wall
The hillside · 3D scan
a Polycam point cloud of the slope the camera watches — turning on its own
Same hillside as the Native Plant Oasis project. Different angle — instead of mapping it in 3D, watch it grow. Seventeen captures a day at clock-locked times for three years, stitched into roughly a two-minute video at the end.
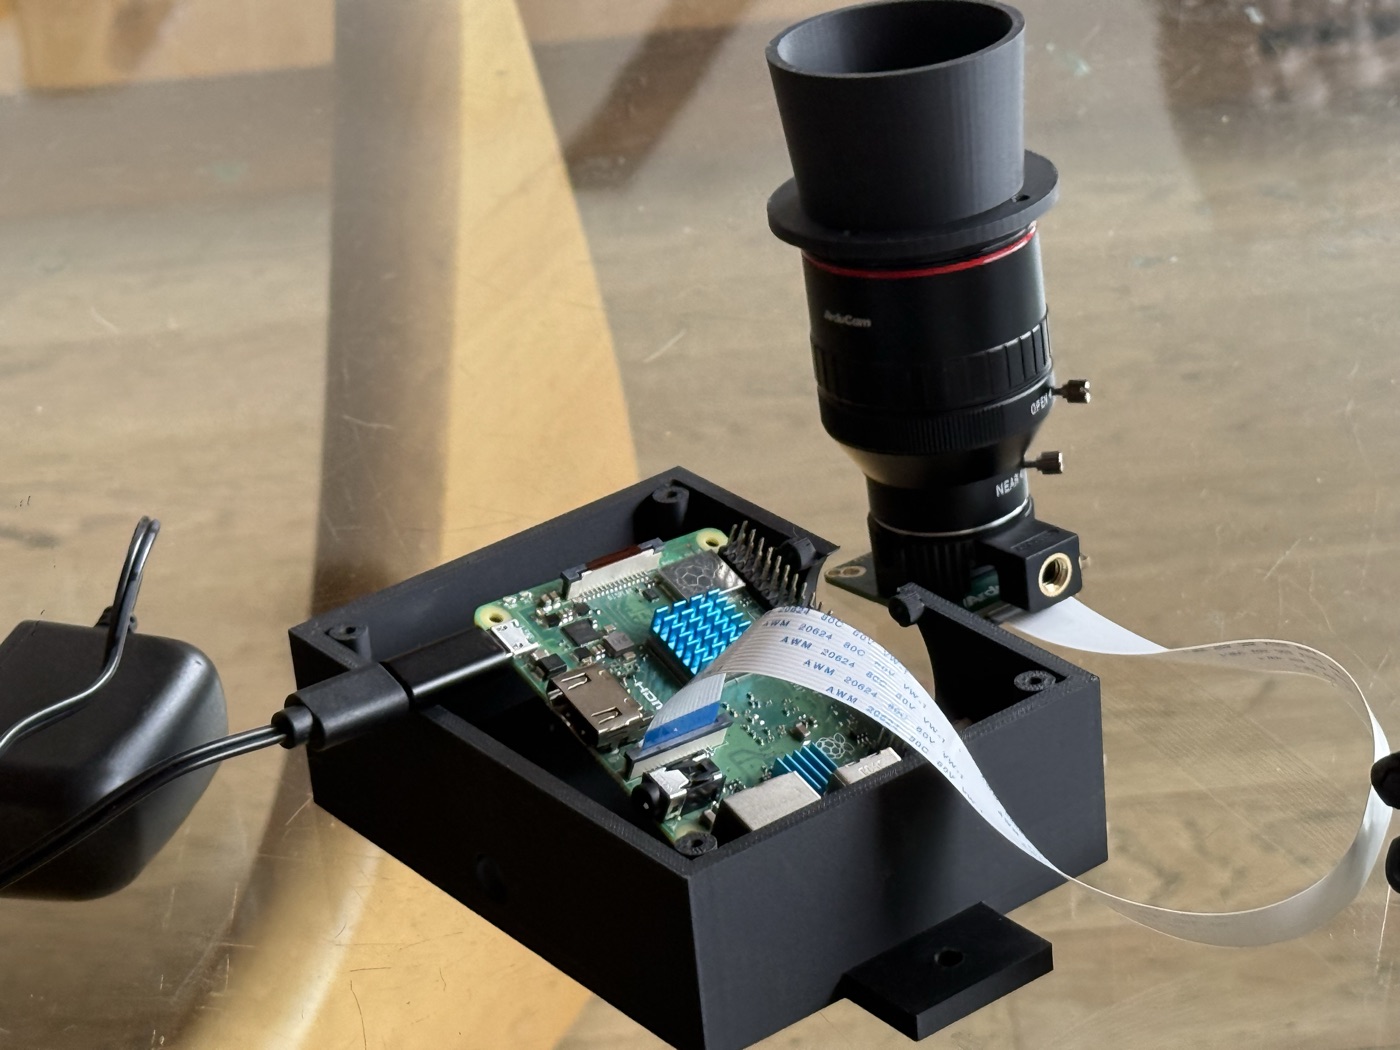
An iterative weekend project that turned into a multi-day rabbit hole. The hardware was the easy part.
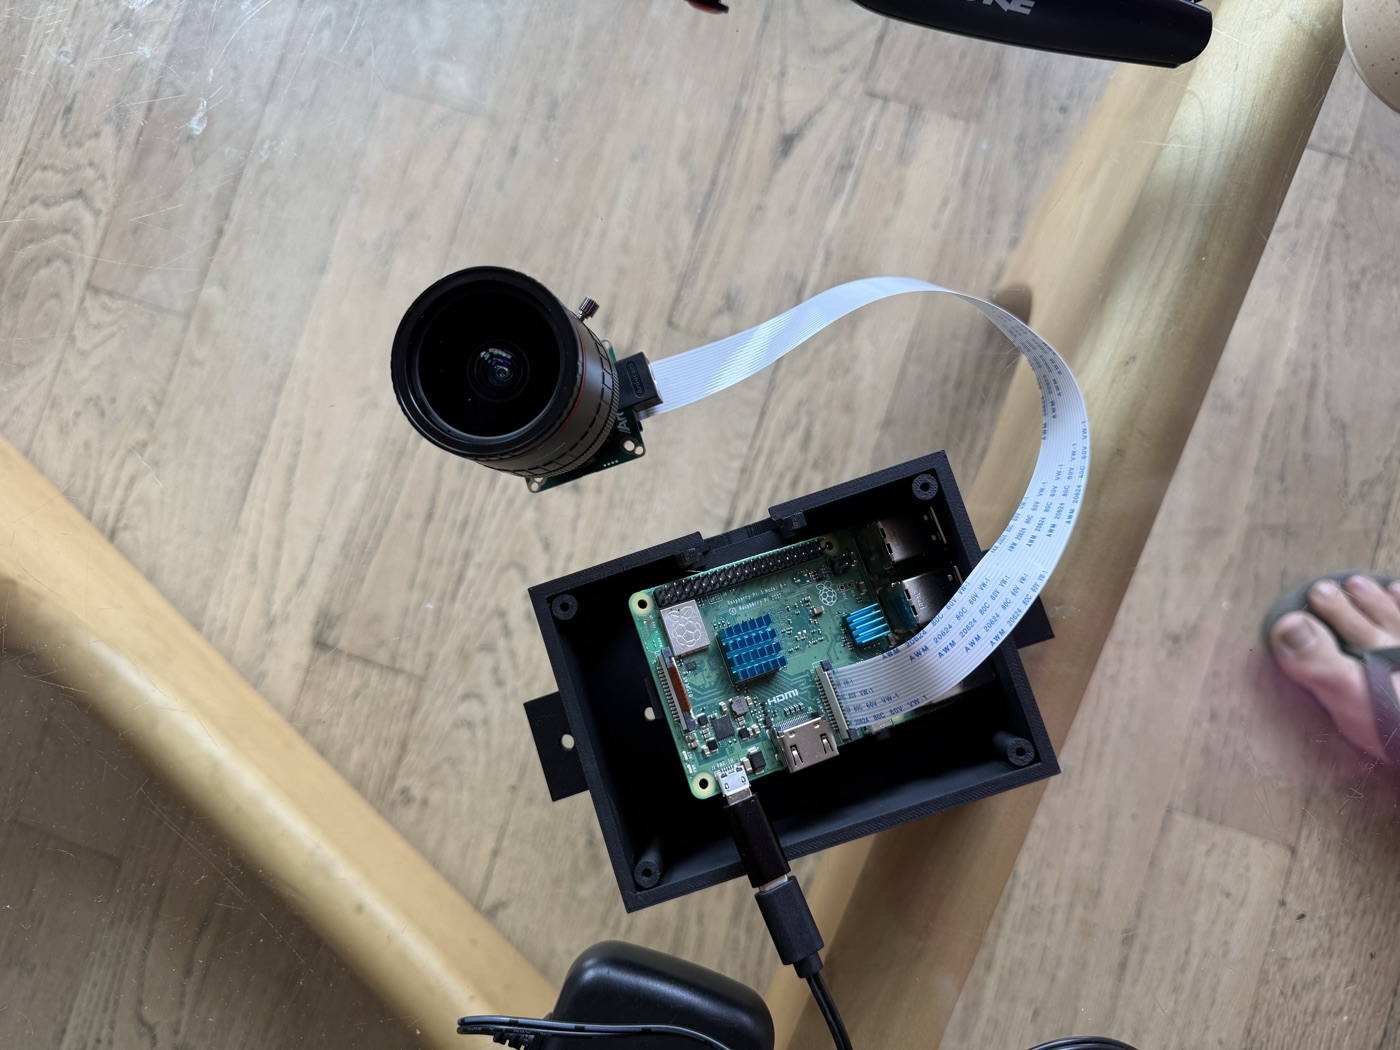
A spare Raspberry Pi from the parts bin, a new Arducam HQ camera board with an IMX477 sensor, and a 2.8–12 mm CS-mount varifocal lens. The Pi does all the work; the camera shoots at full 4056×3040 resolution.
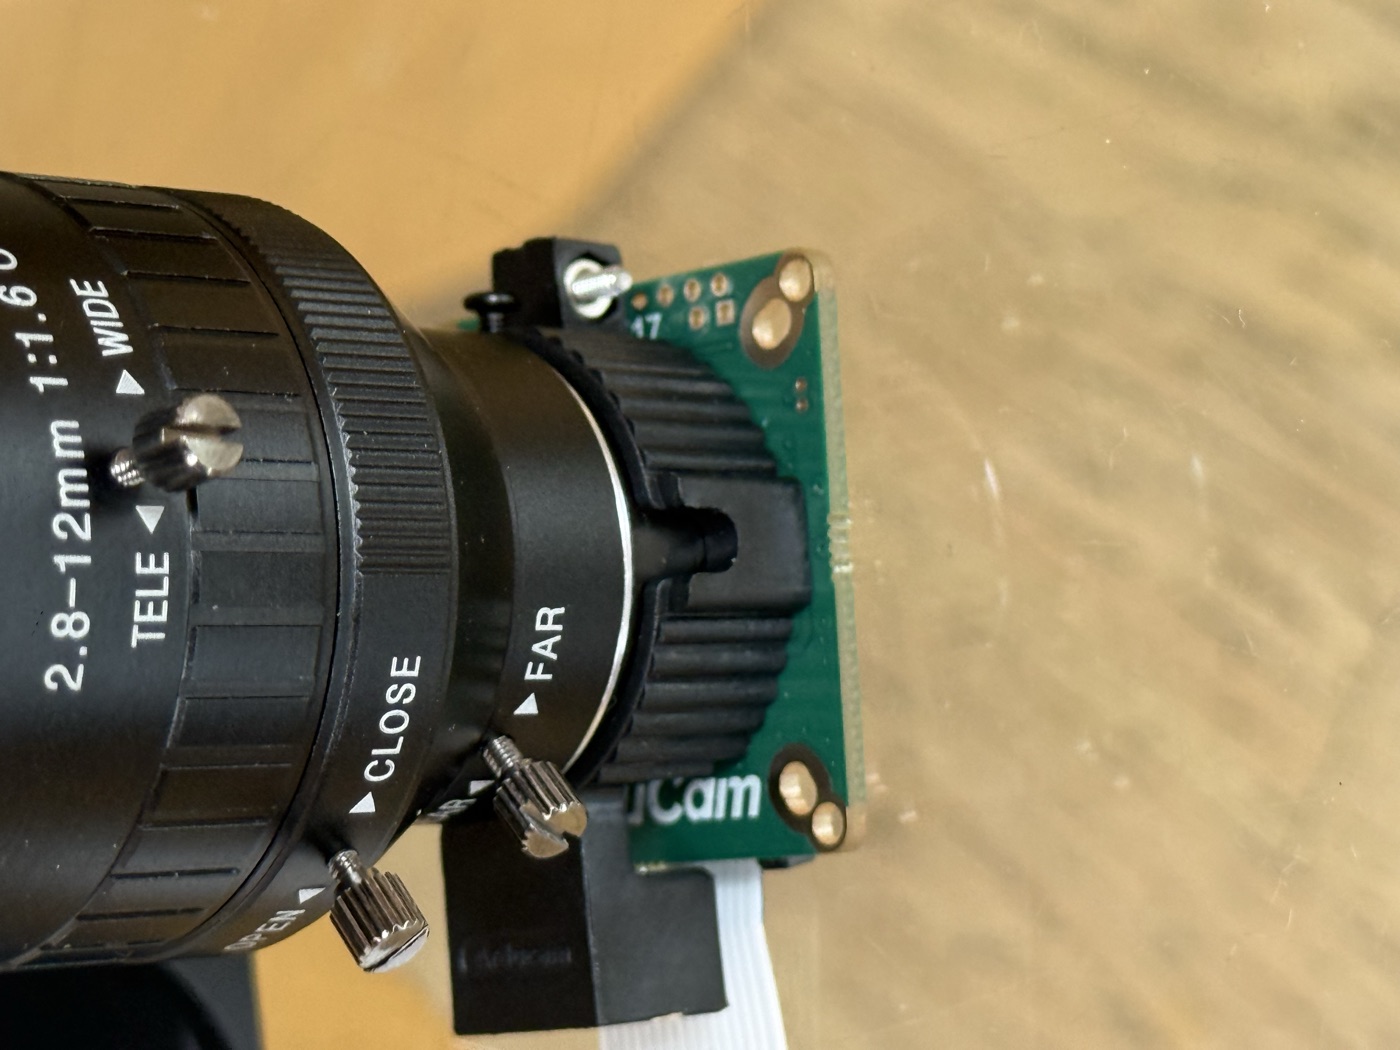
Three rings: zoom (2.8–12 mm), focus, and aperture (f/1.6). Once dialed in, lock the set screws and walk away. The lens design rejects the convenience of autofocus — which is exactly what a multi-year time-lapse wants.
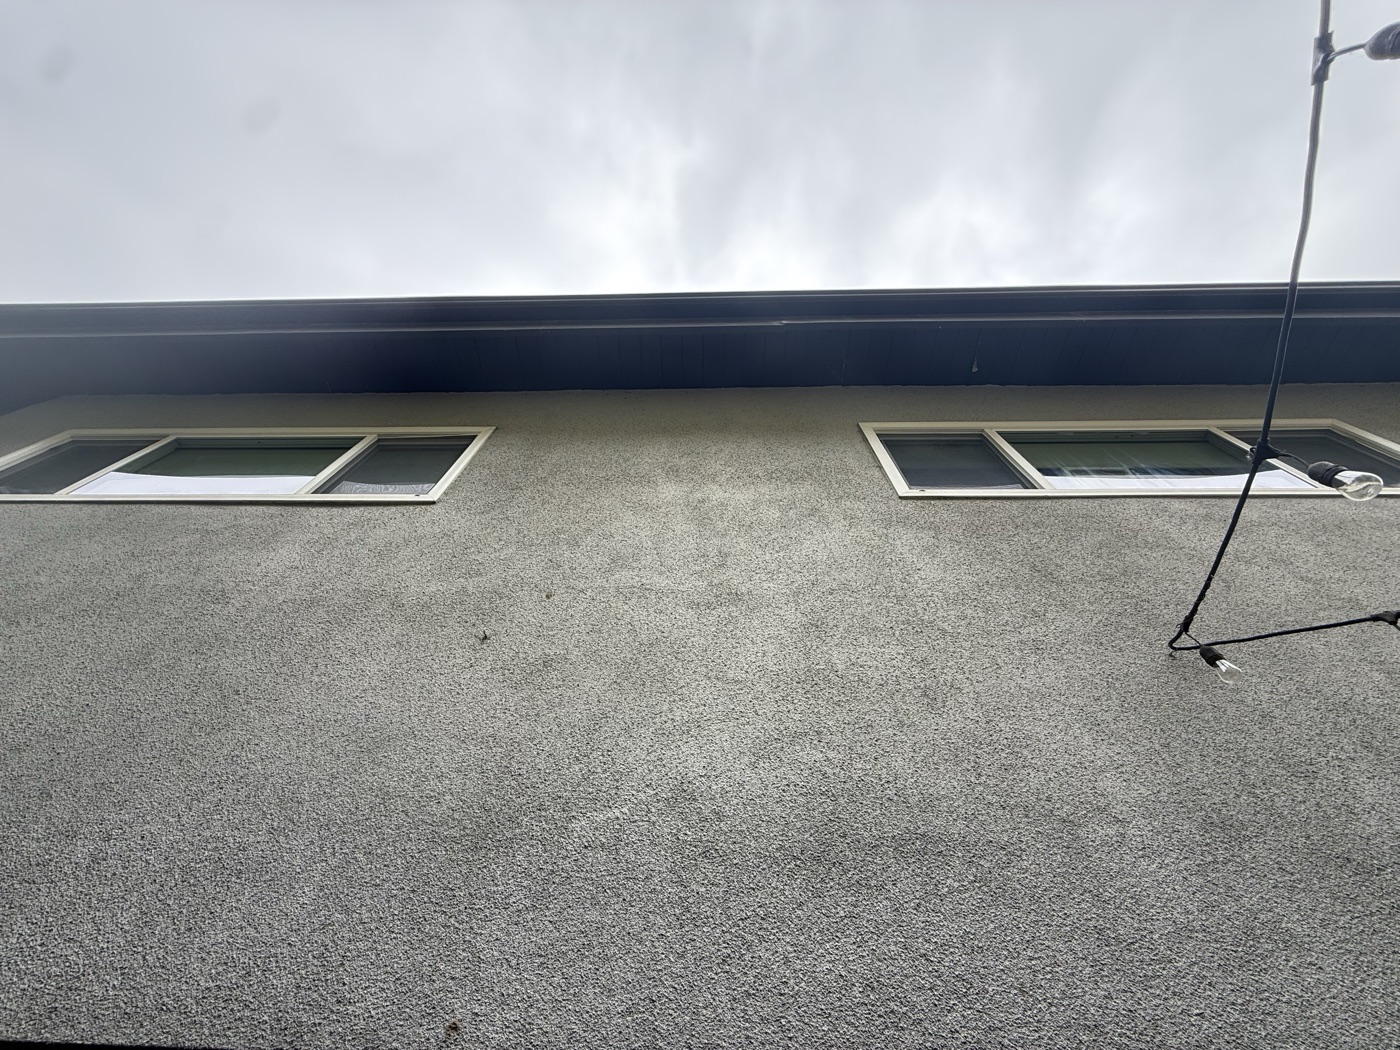
Solid stucco between the two upstairs windows, sightline straight out at the hillside. The deep eave overhang above will handle 95% of the weather without needing aggressive sealing. LA gets roughly 36 days of rain a year; the rest is dry.
Designed for an under-eave shelf mount. Then we pivoted to a flat wall mount and the geometry stopped making sense. Cable cutout too small, Pi standoffs in the wrong column, lens hood didn't account for the wide-angle FOV, the lid notch missing for the wall tab. Useful only as a fit-test.
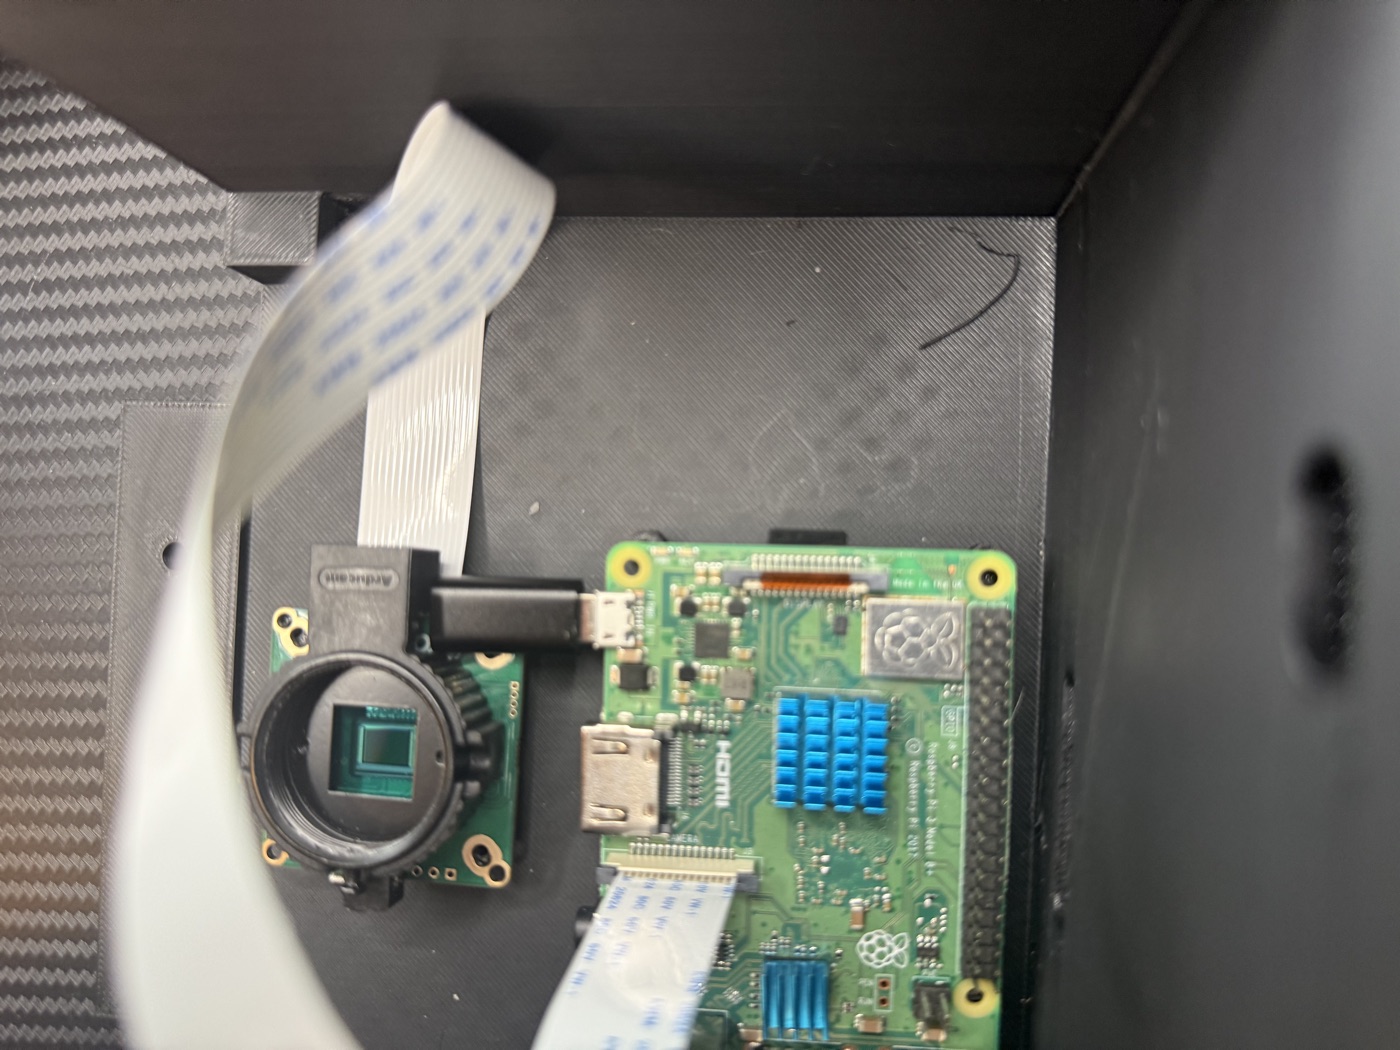
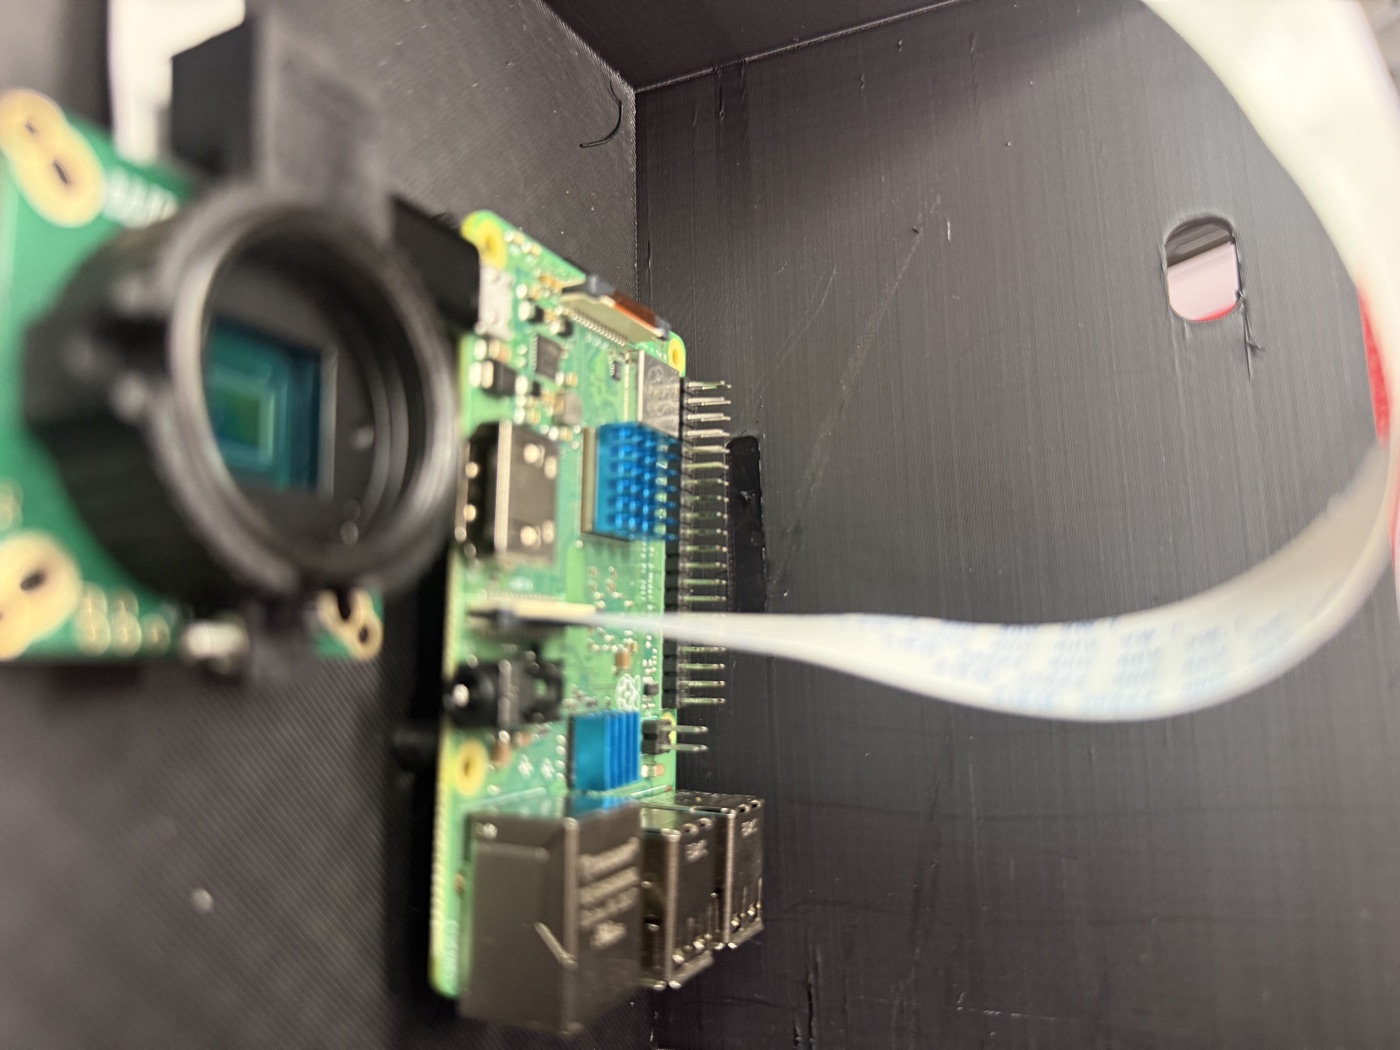
Pi and camera mounted on the same back wall to share rigidity with the house wall behind. But the Pi's HDMI/power ports landed under the camera body, the camera's CSI ribbon connector crashed into the camera-tilt wedge. v3 offsets the Pi 2 cm to the side, removes the internal wedge entirely, replaces full-height lid-screw posts with compact corner brackets, adds a notched 1 mm test plate so future tweaks can verify alignment in five minutes of print time.
Indoors first — same camera, same Pi, same schedule, just pointed through glass at the planned hillside view. A 120-frame test at 30-second intervals stitched into a five-second video proves the whole pipeline before any weatherproofing happens.
Camera mounted upside-down to keep the cable run tidy, so the capture script flips every frame 180° in software. Sealed the seams, walked away — and immediately found the catch: the lens sits recessed roughly 16 mm behind a 55 mm front hole, and at the wide end of the zoom that hole crops the field of view down to a hard black circle. The box is already shut, so the fix lives in two places: crop the vignette out at stitch time, and flare the front opening on the next print.

The rig sat "running" for eight days and shot nothing. The capture service was alive, but a single failed camera init left a half-open handle that locked the sensor for every slot after — and the loop swallowed the error instead of dying, so nothing ever restarted it. Fix: release the camera on any failure, and exit on repeated ones so the system hands the script a clean process.
Timing got the same paranoia. No daylight saving — the clock stays on standard time so every frame lands at the same solar moment and the sun drifts smoothly across three years instead of lurching an hour twice a year. And since the Pi has no battery clock, it now waits for a network time-sync on boot before it photographs anything, so a power blip can't stamp a frame with the wrong time.
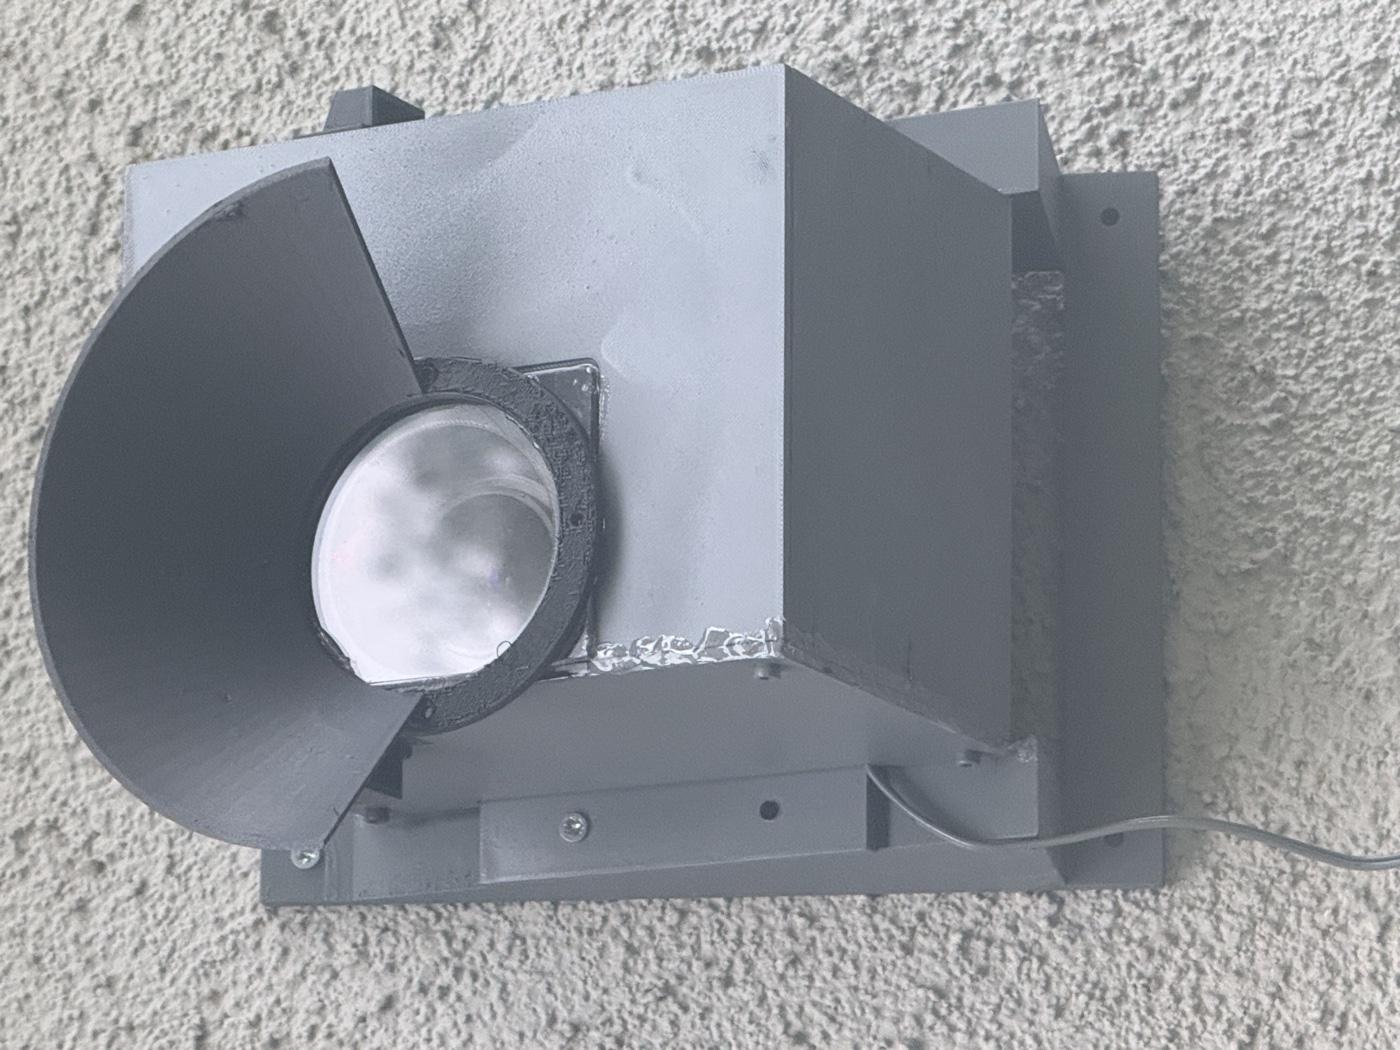
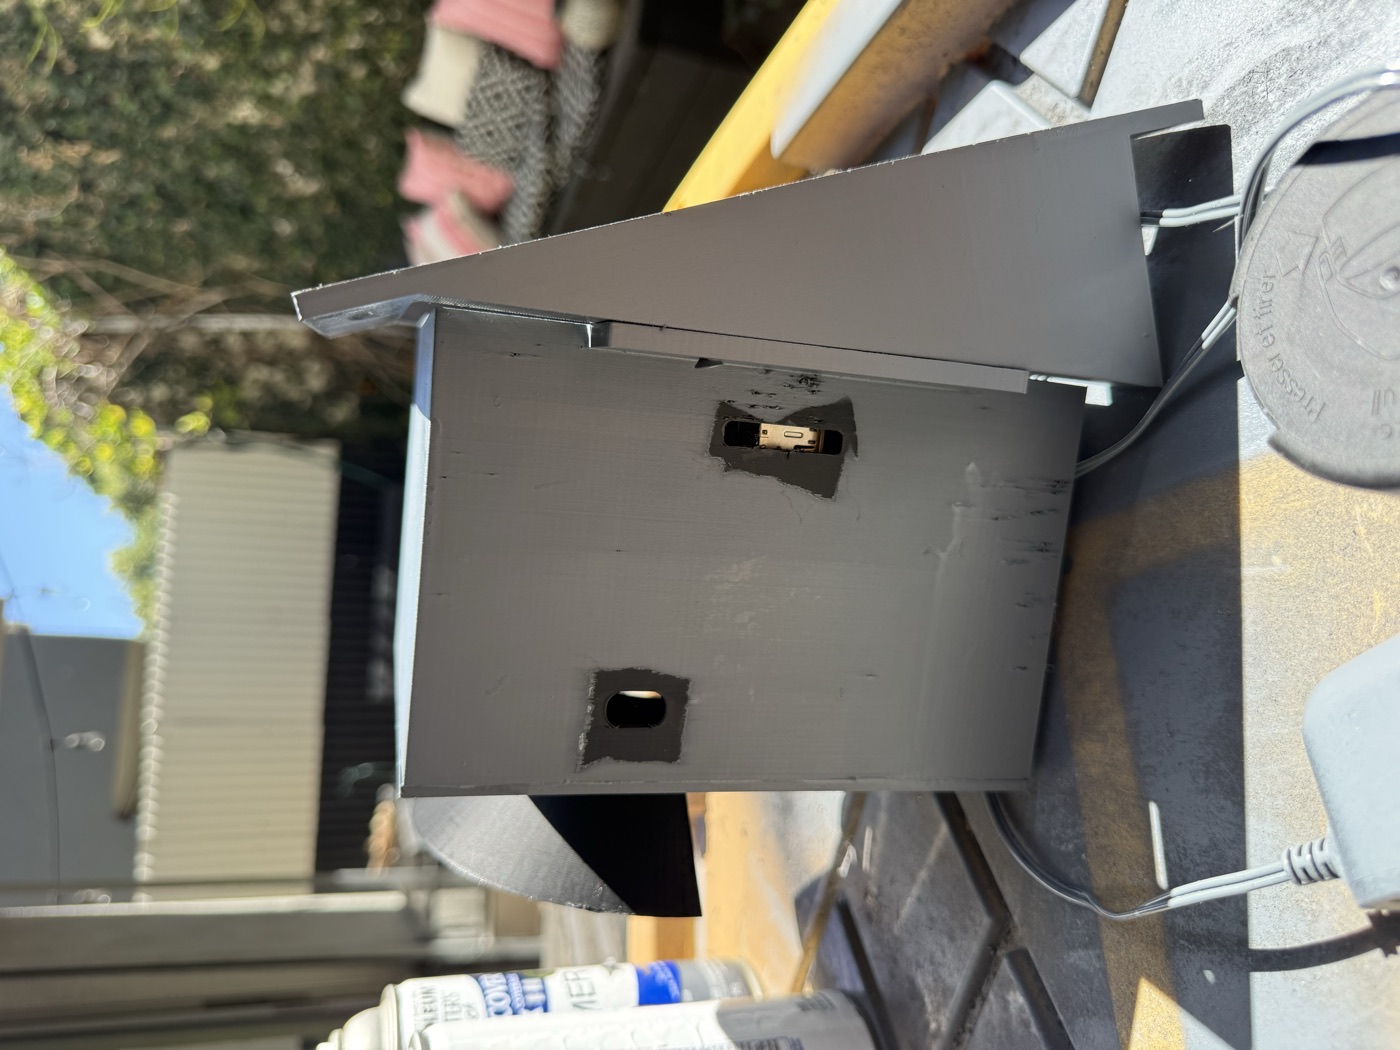
Painted gray, gasketed, and screwed flat to the second-story stucco under the eave. The half-dome visor shades the lens from overhead sun, the acrylic window seals the optics behind it, and the power cable is the only thing that leaves the box. Three years of hillside start here.
First light from the wall: one full-resolution frame off the mounted rig, black circle and all. The indoor pipeline test sits below it. The finished three-year video lands in 2029.
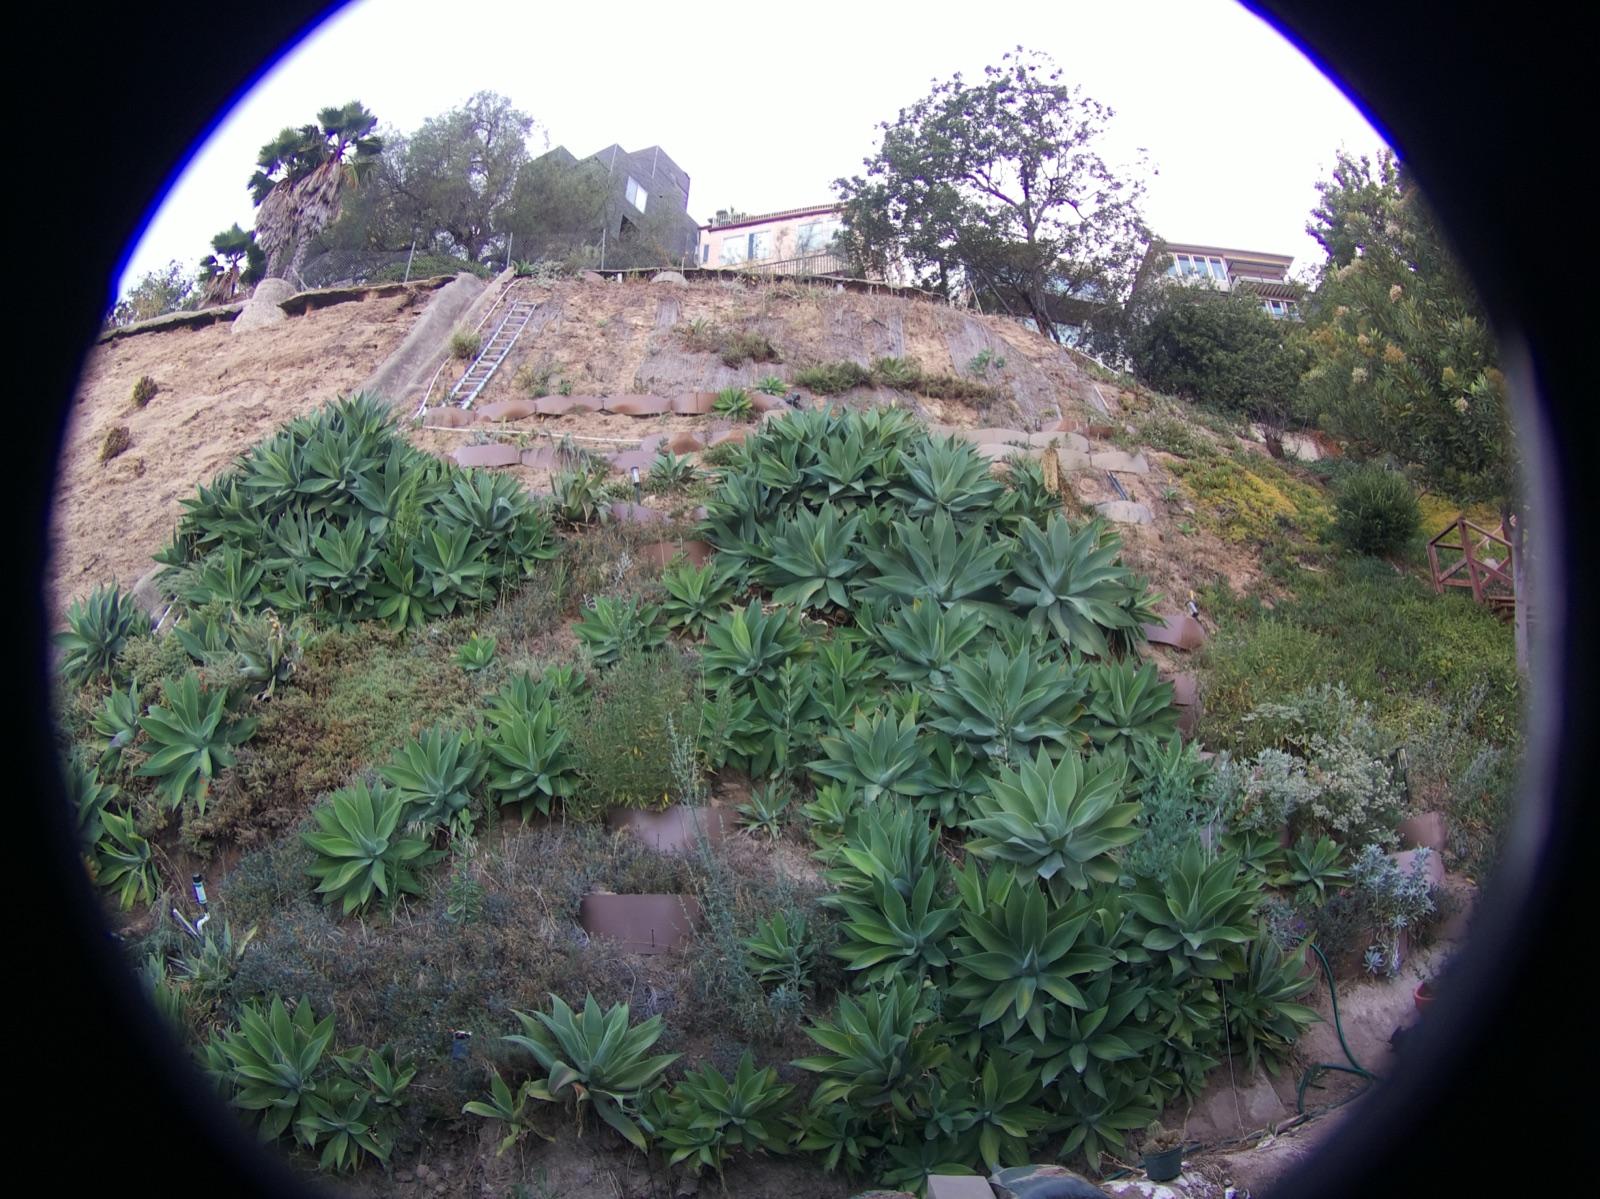
first outdoor frame · 4056×3040 · 2026-05-31
Day one of autonomous captures — the same hillside an hour and change apart, the light already telling a different story:
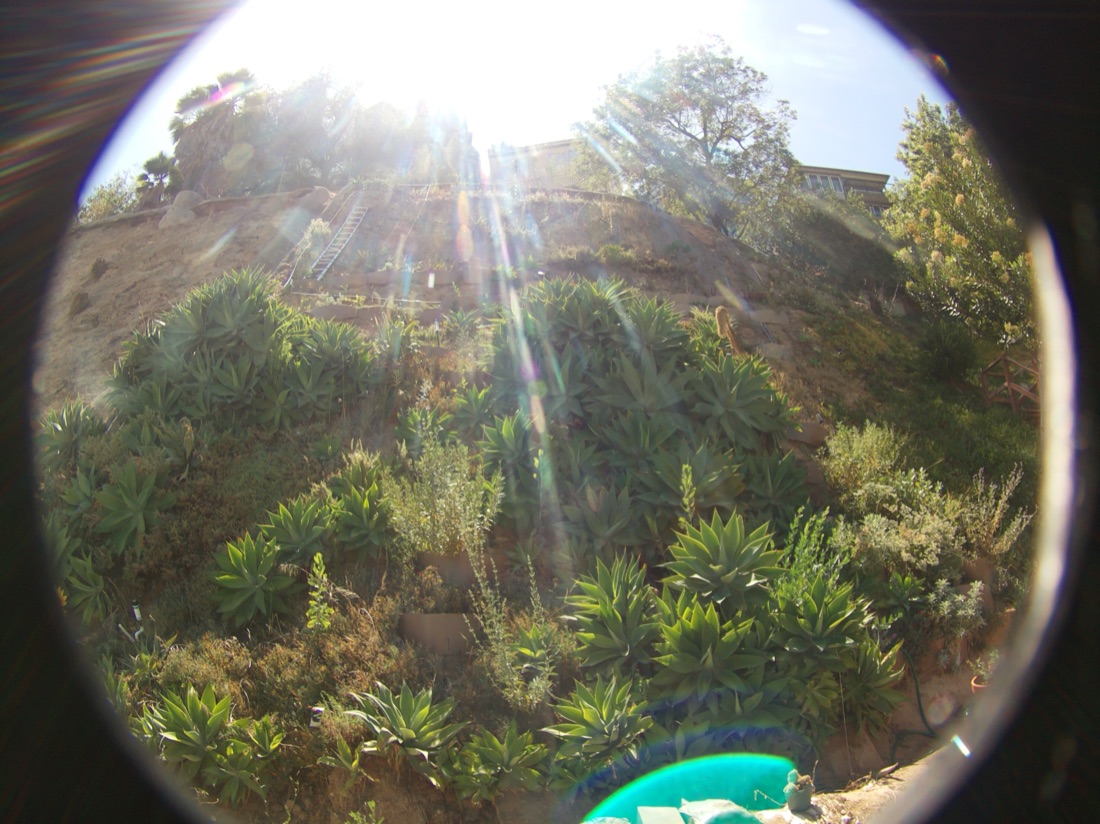
early afternoon · sun in the lens · 2026-06-01
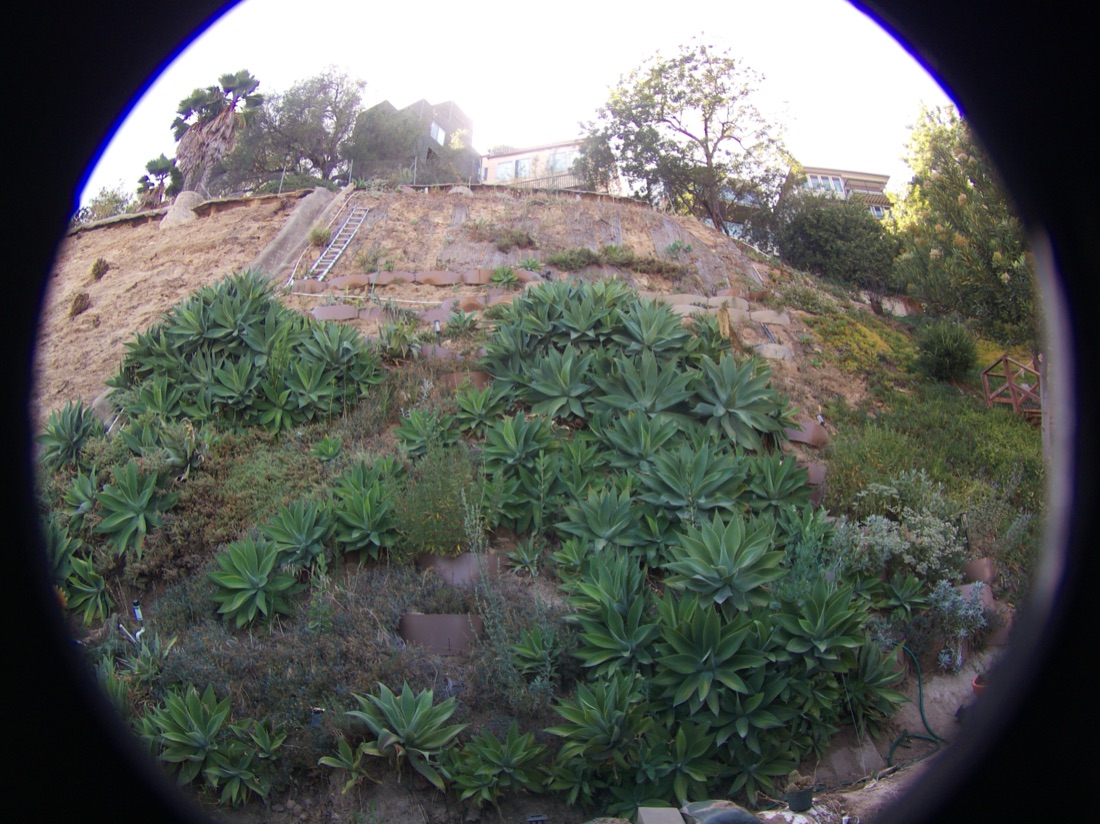
late afternoon · clean light · 2026-06-01
indoor pipeline test · 120 frames · 24 fps · 2026-05-23
v3 STLs — print in PETG or ASA, 4 walls, 30% infill. Designed for the specific Pi 3B+ / Arducam HQ / 2.8-12 mm varifocal stack. See the README for assembly notes.
Spin each printable part — the same files as above, just turning.
The body · body_main.stl
The front face · body_front.stl
The lid / cover · lid.stl
Lens hood — short · hood_short.stl
Lens hood — long · hood_long.stl
Sun visor · hood_visor.stl
Wall tilt wedge · wall_wedge.stl